
Manual Adjustments of an Automatically Calculated Load Plan
Sometimes there are specific aspects to be considered. There are options that can help you adjust the automatically calculated load plan to your needs. For this purpose, you can either use priority groups (see the next chapter) or adjust the proposed load plan manually:
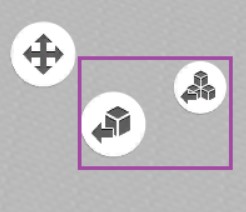
to move the box, click on it with the left mouse button
by pointing at the green highlighted areas you can choose where the box will be placed
click again and the box will be placed in a new position
please keep in mind that a box can be placed on non-stackable items as well, no constraints are applied when adjusting the load plan manually
moving the box around, the box will automatically snap to the nearest box
you can zoom in and decrease the snapping distance with the mouse roll-wheel
to rotate a box, click on it with the right mouse button, and click any arrow to rotate it to the desired direction
if the box frame is red it means the box is in an invalid position and can´t be placed there
by clicking the right mouse button again you can switch back to move mode and fix the box position
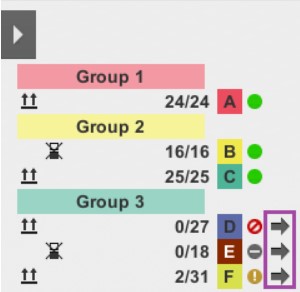
you can remove the box (just one or all of them) from the load plan by the icons with the arrow in the lower right corner, next to the Load button, or hitting the Delete key on the keyboard:
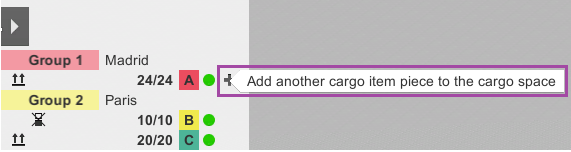
you can add more boxes with the black arrow icon in the input list
By pressing the + button next to the green dot, you can increase the input count of items
(To get this option displayed, the view of individual items needs to be collapsed.)
In our video tutorial, you can find detailed instructions.